I love altering items, and Lunch Pails are my favourite. I made this lunch pail for my new little cousin. The lunch pail is made so that my cousin can put treasures and photos of him as he grows. Each of the dividers is made with a spot where she can journal so of the new things he is doing that month. I didn't want to make it to with baby paper as I wanted it to fun an vibrant. Something that she could have on display even when he gets older.
I used the new Bo Bunny "Around the Block" line to decorate the whole tin. I love how all of Bo Bunny products go together so easily. Because this will be about my 10th Lunch Pail I have made I decided it was time to make a cut file with my gypsy to do all the hard work for me. I made a cut file for the main part of the pail that cuts out the area around the latch. Then I made a cut file for the lid that cuts out around that handle pieces. It took sometime to get it just right but it will now be faster when I go to make the next one.
On the front I used my Cricut to cut out the letters for his name. I used the Printing 101 font cartridge at 2" for the "H" and 1.5" for the "ayden". All of the ribbon is also from Bo Bunny as well. The two buttons on the front are from my button stash.
On the inside of the lid I used some more paper from the Around the Block line to cover and add a spot for a photo and all of his birth details. The stamp for the details is from the Stamping up set "Bundle of Joy". I stamped it with Early Espresso ink. I also used coordinating Bo Bunny Dot paper to make a mat for a 2x3 photo. I accented the mat with my EK Success corner punch.
The divider cards are made from Bo Bunny Dot paper. I used my computer to make the template for the spot for her to right about the month. I stamped the "Month" portion using the Solo sets from CTMH with a combination of Stampin' Up inks (Early Espresso, Old Olive, Cherry Cobbler & Pacific Point). I accented the info sheet with the EK Success photo corner punch. I made the tabs using the Tab punch from Stampin' Up. The months are stamped using the "Save the Date" set from CTMH. I stamped them onto Very Vanilla cardstock which I cut small ovals with my cricut. I used the same combinations of inks as I did on the information card.
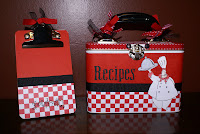
For fun I thought I would add a few other lunch pails that I have made before...
ENJOY!!!


.jpg)


Really cute Jennifer, I've never tried to make one of these. I didn't think I liked that paper line, I love what you did with it.
ReplyDeleteLOVE how this turned out - this is an awesome idea! It is so perfect and I love how you did all those little cards to go inside. Hmmm - this would be such a great gift....may have to lift this idea!
ReplyDeleteCheers,
Shanna :)
This tin turned out gorgeous! You know I love how you did the cards on the inside. What a fabulous gift that is also an amazing keepsake.
ReplyDelete